Fashion
How to Measure a Shirt Neck on an Existing Garment
Name both endpoints before comparing collar numbers.
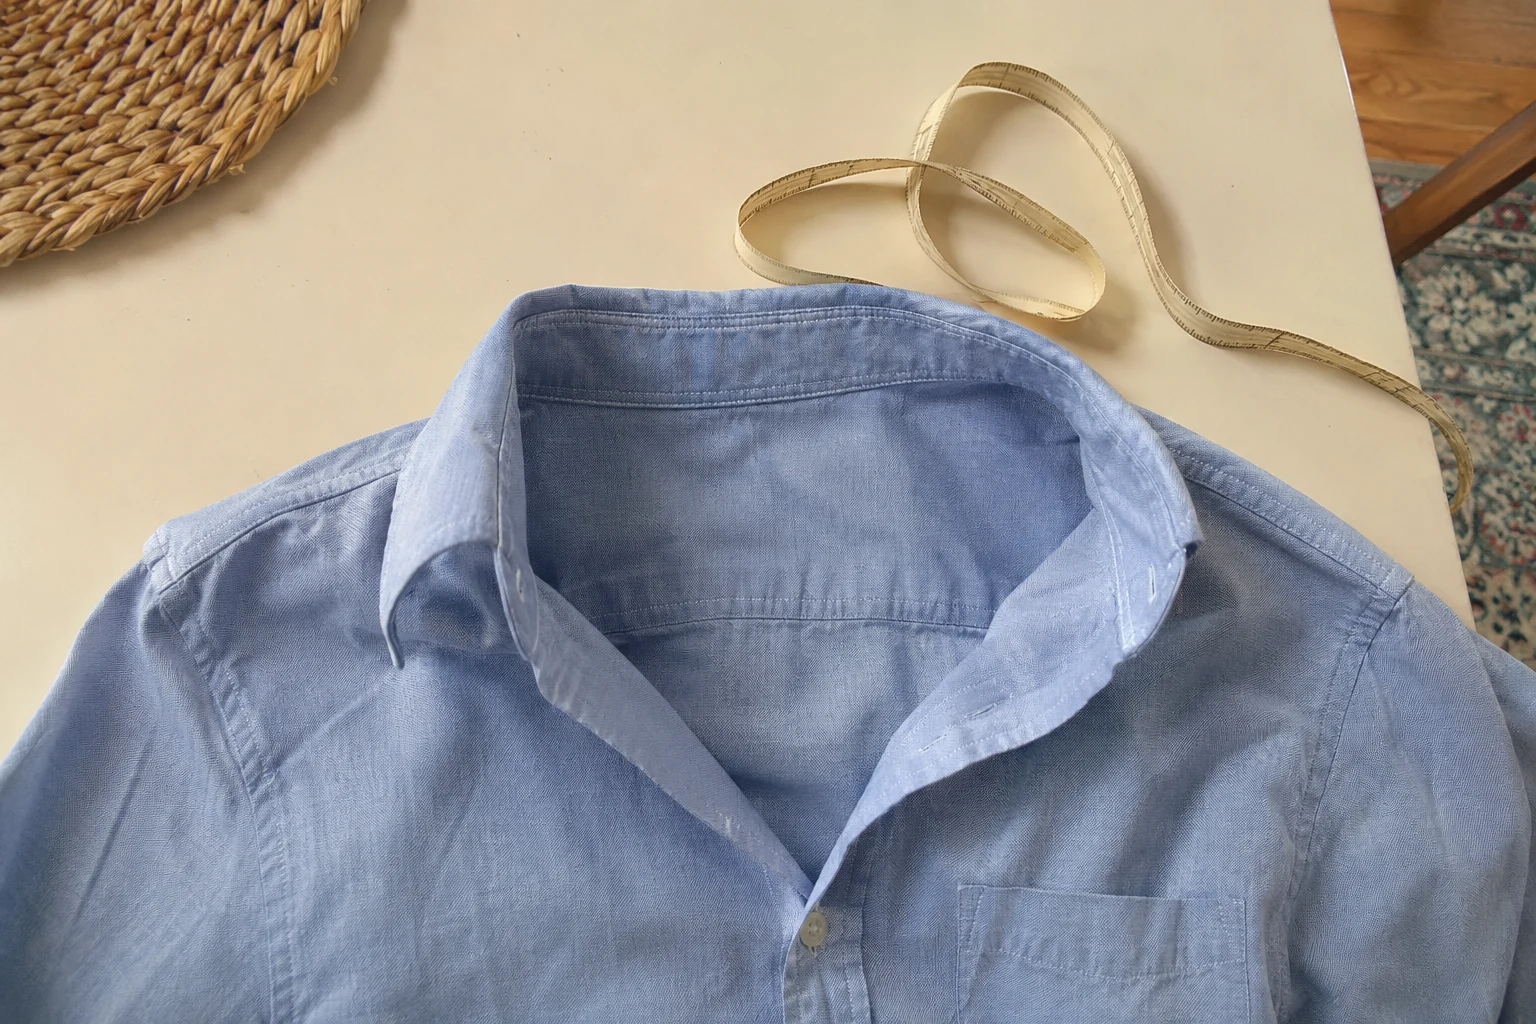
To measure a shirt neck on an existing garment, open the collar and identify the maker's stated endpoints on the collar band. Measure that route with a flexible tape and record the units and care state. Keep this finished collar measurement separate from your body neck circumference and the size printed on the label.
Decide whether you are measuring a collar or a person
A finished shirt measurement describes fabric and fastening positions. A body measurement describes the wearer. A size label may follow the maker's own sizing convention. When a seller says neck size, ask which of these they mean before comparing numbers.
Choose a shirt whose collar is comfortable when worn the way you intend to wear the next one. A shirt always worn open can be a poor reference for a collar you plan to button with a tie. Record whether the reference has been laundered according to its label, and whether the top button has been moved.
Our flat garment comparison guide explains the same route-and-state principle for other dimensions. The collar needs its own record because its usable closure does not run simply from one fabric edge to the other.
Set up the collar band
Place the shirt on a clean table with the collar unbuttoned. Lift the collar leaf enough to see the band beneath it. Identify the top fastening button and its corresponding hole. Do not measure around the pointed collar leaf or include a detachable collar's decorative projection.
Smooth the band without forcing a permanently shaped collar flat. If it will not lie as required by the maker's method, photograph that limitation and ask for guidance. A reading taken across a curved band by one seller may not match a reading along the band by another.
Use a flexible, non-stretch tape and check that its zero marking is intact. Keep the tape readable and in contact with the intended route. Record the result rather than rounding it to the nearest familiar shirt label.
Use the endpoints requested by the maker
Proper Cloth's collar measurement instructions use the button's center on the inside of the band and the far end of the matching buttonhole. That is one documented convention. Record those endpoints explicitly if you use it, and follow the instructions for the particular chart you are comparing against.
- Locate the button stitching visible on the inside of the band.
- Identify the matching buttonhole and the specified point at its opposite end.
- Position the tape according to the maker's straightening instructions without stretching the fabric.
- Read and write the units, route and endpoints.
- Remove the tape, reset the collar and repeat once to check your placement.
Do not silently swap the far end of a buttonhole for its center. Do not start at the tip of the band instead of the button. Small endpoint changes matter when comparing a close-fitting collar. A photograph showing both endpoints lets another person reproduce your method.
Keep a comparison note rather than a conversion rule
Use separate fields for the label, measured closure route, unit, care state and button position. Add whether the collar was comfortable when fully fastened. If a seller supplies only the label, the measured field stays unknown.
An illustrative comparison might show a reference collar measuring 40 cm by a named route and a second shirt measuring 41 cm by that same route. The second reading is 1 cm longer on the table. It does not establish that every part of the shirt is a size larger or that its collar shape will feel identical.
Compare cuff measurements separately. A matching neck dimension does not establish matching wrists, sleeve length or chest room. Likewise, the shirt hem width cannot predict the collar opening from the proportions of a photograph.
What about measuring your own neck?
Use a body chart when a retailer asks for a body measurement. Charles Tyrwhitt's shirt measuring guide provides a neck-measuring procedure for choosing its shirts. That is a different task from measuring a finished band. Follow the retailer's allowance instructions rather than borrowing a finger rule from an unrelated chart.
Do not add an assumed shrinkage amount to a used shirt's measured collar. The garment's current care state is evidence; an imagined original dimension is not. For a new custom order, ask the maker how its finished specifications account for the selected fabric and care. Keep its answer with the order instead of applying it to other brands.
Resolve a mismatch before moving a button
If the label and your reading disagree, repeat the endpoints first. Then check whether a previous owner moved the top button, whether the collar is distorted and whether the chart uses a body or garment dimension. Ask the seller for a fresh measurement with the tape visible.
Moving the button can change overlap and the way the collar closes. It cannot change the collar leaf, neckline or chest fit. Try the shirt naturally fastened and ask a fitter about a persistent problem before making a favorite shirt your experiment. Save the measurement note even if you decline the purchase; it improves the next comparison without inventing a universal neck-size conversion.